
Run Metasploit, Nmap and Nuclei on Android
Run Metasploit, Nmap and Nuclei on Android — no root, no PC. A complete, screen-by-screen guide to Lupus: create your account, choose how the engine runs (on the phone or on a remote agent), and work every module — scanning, the workspace database, exploitation, sessions and settings. Every screenshot below was taken on a real device.
Guide contents
- Overview & responsible use
- Create your account
- Activating Pro & how to pay
- First launch: choose a mode
- Local mode
- Remote mode & the agent
- Teams & shared engagements
- The main menu
- Scanning — Nmap
- Scanning — Nuclei
- The workspace database
- Import & export
- Exploits
- Auxiliary
- Payloads & handlers
- Your own modules
- msfconsole
- Sessions & post-exploitation
- Jobs & background tasks
- Keeping Lupus off the test network
- Settings
- Troubleshooting
Overview & responsible use
Lupus is a self-contained offensive-security workspace for Android. It bundles a full Metasploit Framework, PostgreSQL, Nmap and a terminal environment, and wraps them in a touch UI: scan a target, collect the results in a workspace database, launch exploits and auxiliary modules, and drive the sessions you land — all from the phone.
The engine can run in two places: locally, directly on the device, or on a remote agent you connect to. The rest of the app works the same either way.
Lupus is for lawful, authorized testing and education. Only scan or attack systems and networks you own or have explicit written permission to test. You are responsible for how you use it.
Create your account
Lupus is tied to a Lupus account — that account is what carries your Pro entitlement across devices and builds. On first launch you land on the sign-in screen.
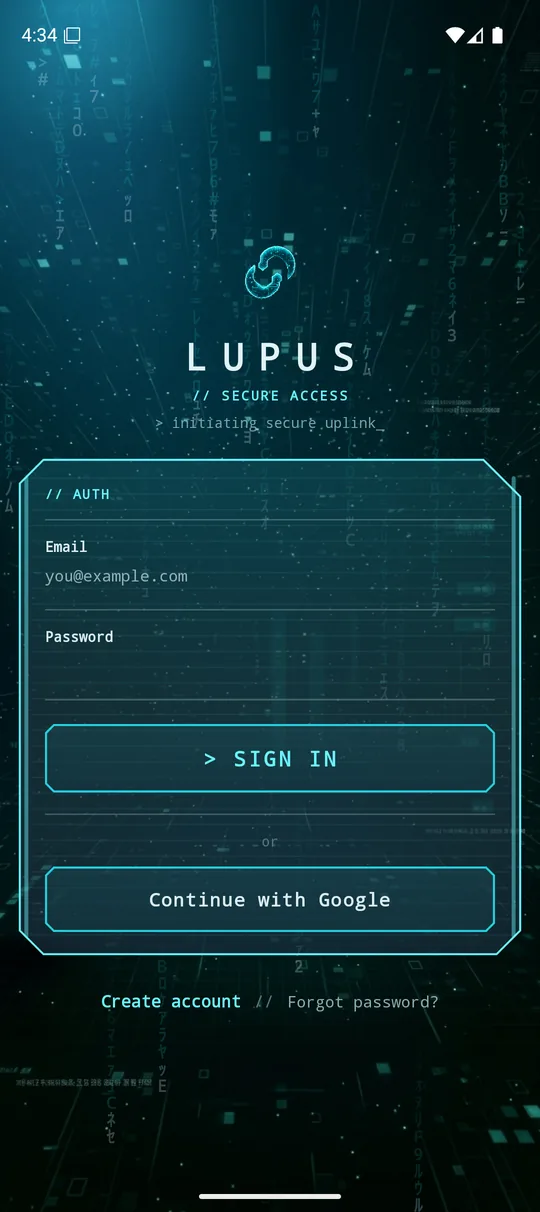
1 · Sign in screen
Enter your email and password to sign in, use Continue with Google, or tap Create account at the bottom if you don't have one yet. Forgot password? starts the reset flow (you'll get a reset email).
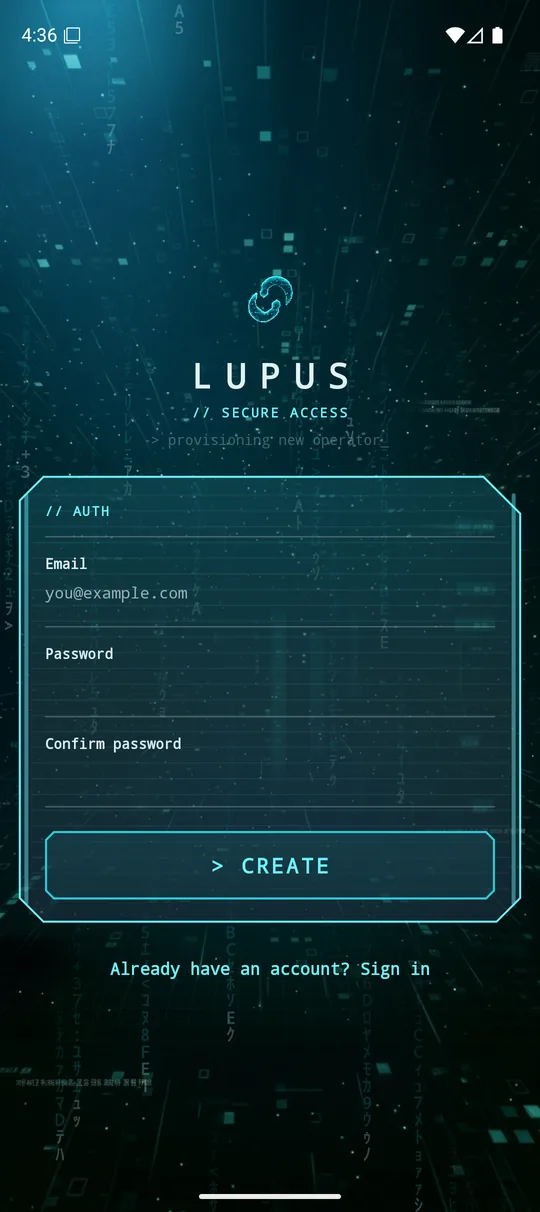
2 · Create account
Provide your email, a password (minimum 8 characters) and confirm it, then tap Create. The account is provisioned and a 6-digit confirmation code is emailed to you.
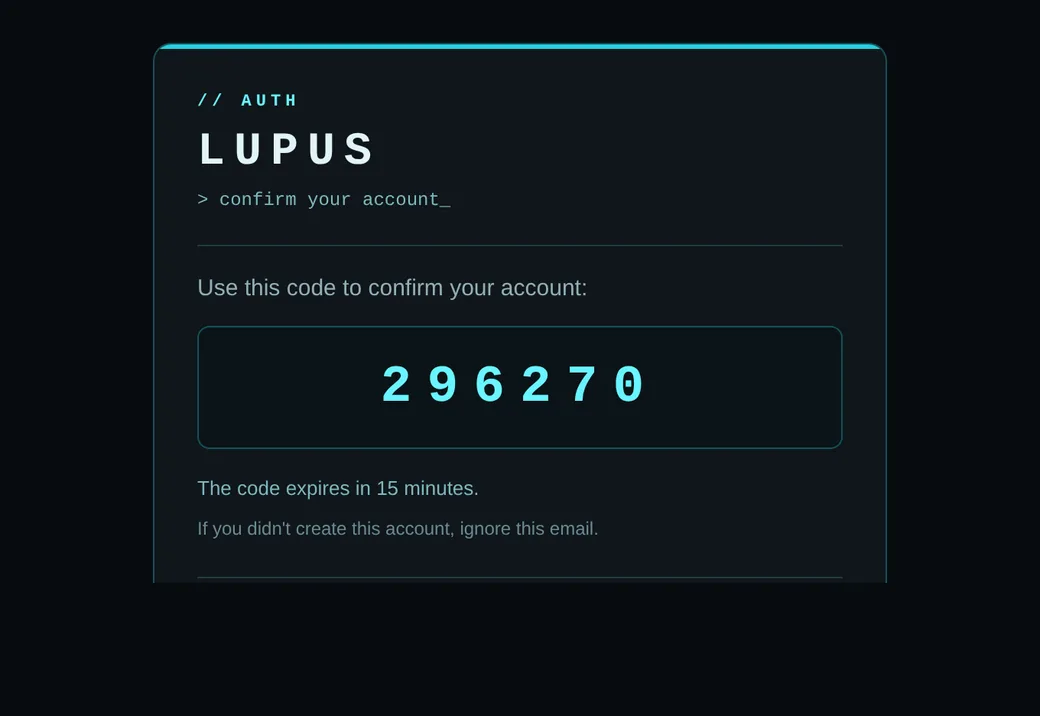
3 · The confirmation email
Within a few seconds you receive a “Confirm your Lupus account” email containing a 6-digit code. The code expires in 15 minutes. If it doesn't arrive, check your spam/promotions folder and use Resend code.
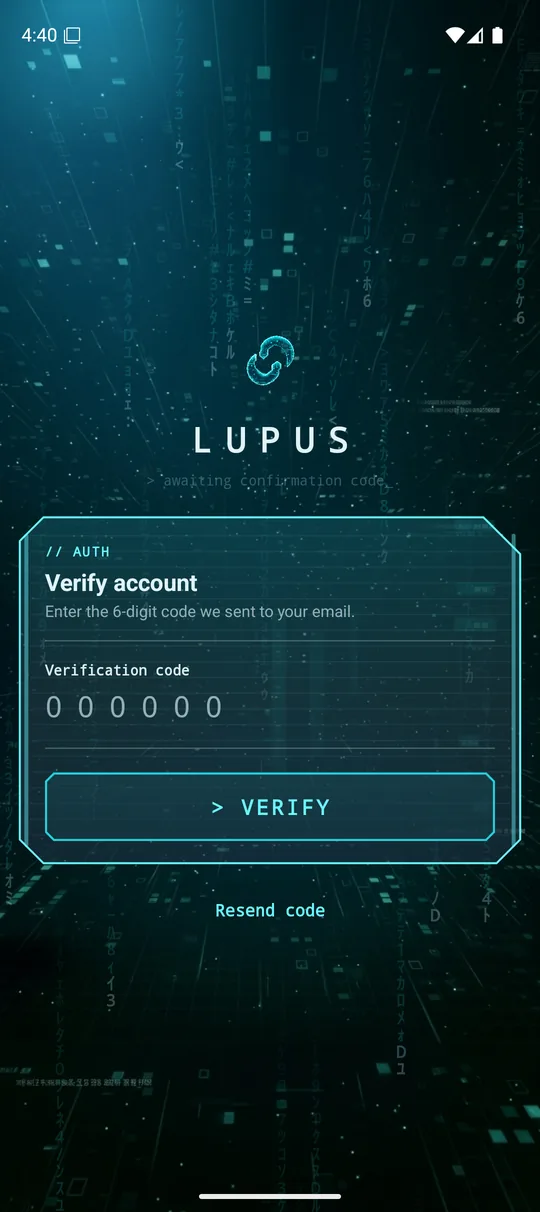
4 · Verify
Type the 6 digits into the Verify account screen and tap Verify. Your account is now confirmed and you're taken into the app.
Activating Pro & how to pay
AI uses your own provider API key, including the free models available to your provider account. Open AI Provider settings in the app, select a provider, add its key and choose a model. Provider charges and quotas are separate from Lupus Pro and the five AI session credits. OpenCode Zen and Go are no longer offered.
The free tier covers scanning, the workspace database, browsing exploits/auxiliary, running modules and opening a session. Pro unlocks the advanced workflow: editing the database, Nuclei, msfvenom, payload handlers, import/export, unlimited background tasks, your own custom modules and payload files, and the full post-exploitation toolkit (file explorer, process manager, post modules).
Pro is tied to your account, not the device: pay once and sign in anywhere — the app re-checks your entitlement on sign-in and unlocks automatically. Whenever you open a gated feature on the free tier, an upgrade card explains what it unlocks and routes you to the payment options.
Plans
Three plans, all unlocking the same Pro features — pick the billing that suits you:
- Monthly — recurring, cancel anytime. 7-day free trial.
- Annual — recurring yearly, the best value. 7-day free trial.
- Team — billed per seat, one subscription for the whole team. See Teams & shared engagements.
Prices are in USD.
How to pay
There are three payment rails, all ending in the same account-based Pro unlock:
- Google Play builds (separate release channel) — tap a plan (Yearly / Monthly) on the in-app Pro card and complete the purchase through Google Play billing.
- Card / PayPal (web) — on the in-app card tap Other ways to pay (or open the pricing page in a browser) and use the Get plan button to check out with a card or PayPal.
- Crypto (web) — on the pricing page use Pay with crypto to pay in BTC, ETH and other assets; Pro is granted automatically once the payment confirms.
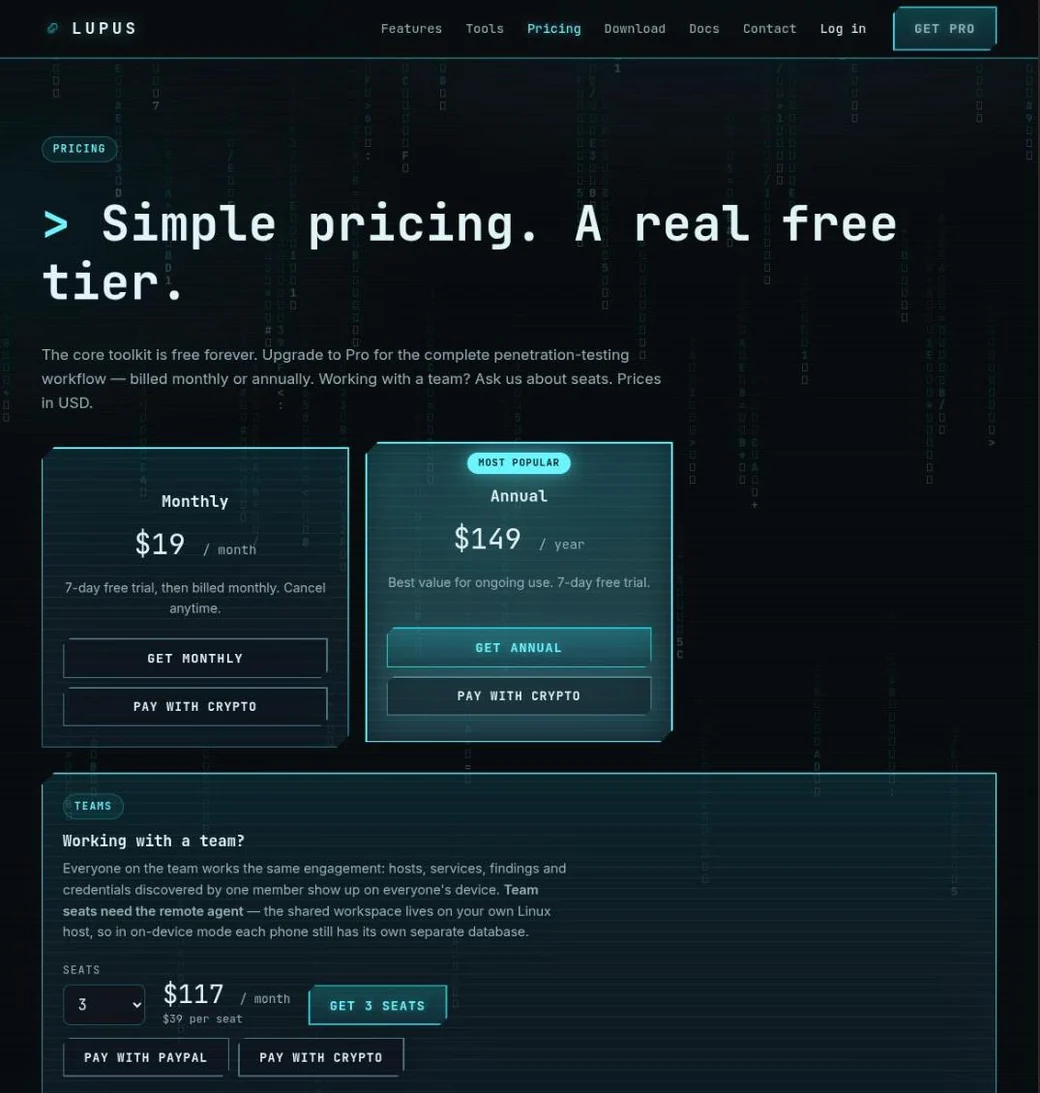
However you pay, the entitlement attaches to your account. In the app, just make sure you're signed in with that account — Pro unlocks on the next sign-in. You can review your plan, renewal date and payment history, or cancel a subscription, from the account page on the web.
First launch: choose a mode
After verifying, Lupus asks for two permissions and then how it should run:
- Notifications — so long-running scans and jobs can report progress.
- All files access — Lupus stores its Metasploit environment, loot and database on the device, so it needs full file access. Tap Continue and enable Allow access to manage all files in the system screen that opens.
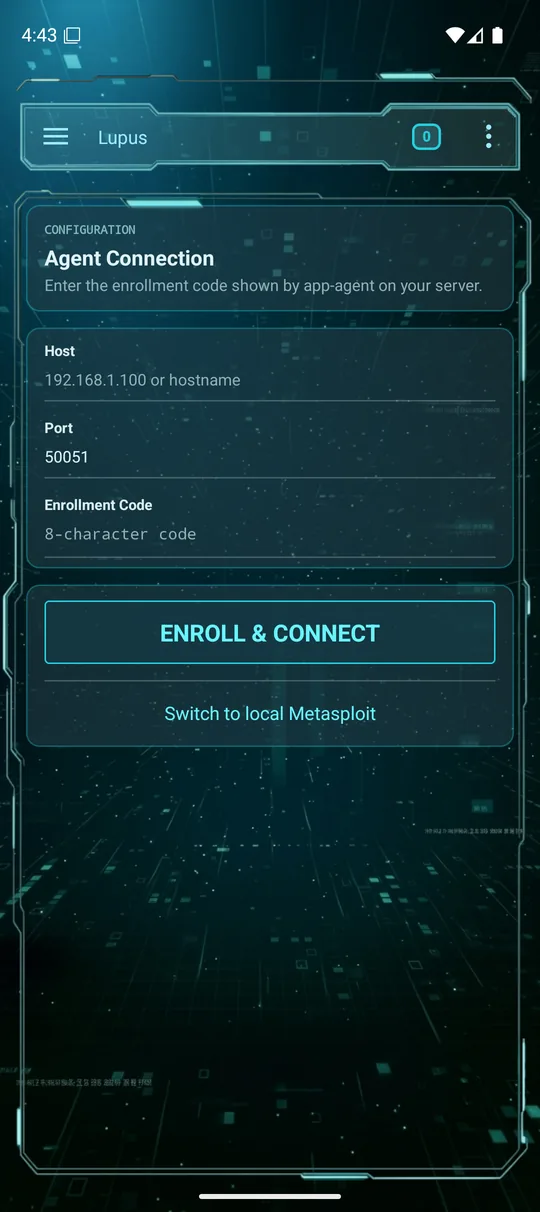
Then you choose the engine: local (run everything on the phone) or remote (connect to an agent). You can switch later; this is just the starting point.
Local mode
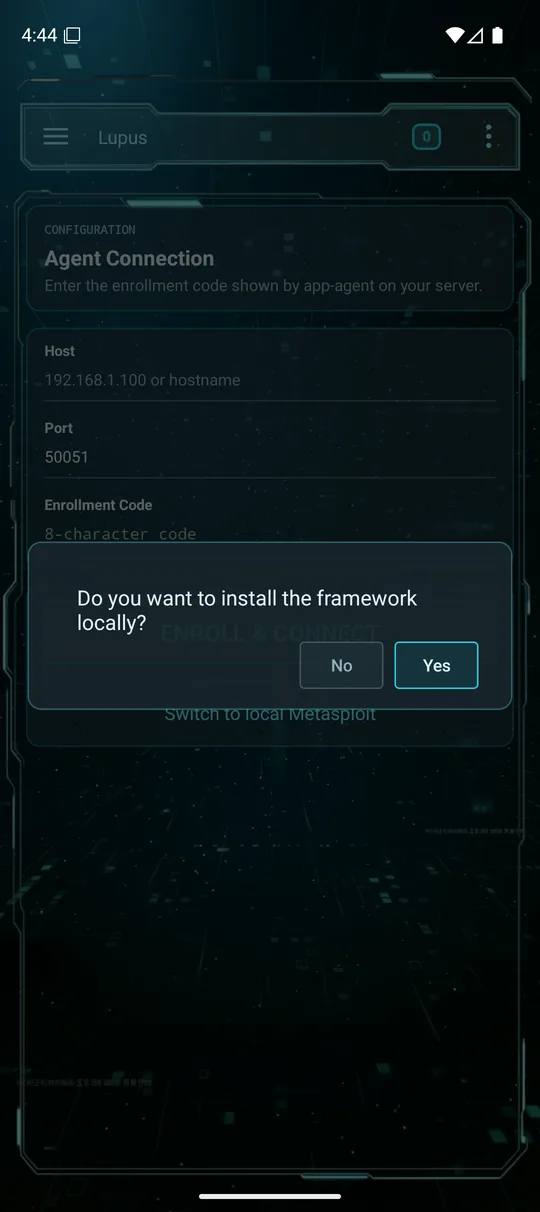
Local mode runs the whole stack on the device. Tap Switch to local Metasploit and confirm the install prompt. Lupus then unpacks a self-contained environment — Ruby, the Metasploit Framework, PostgreSQL and Nmap built for your device's architecture.
The first install needs roughly 2 GB of free space and a few minutes. It runs once; afterwards the engine boots in seconds.
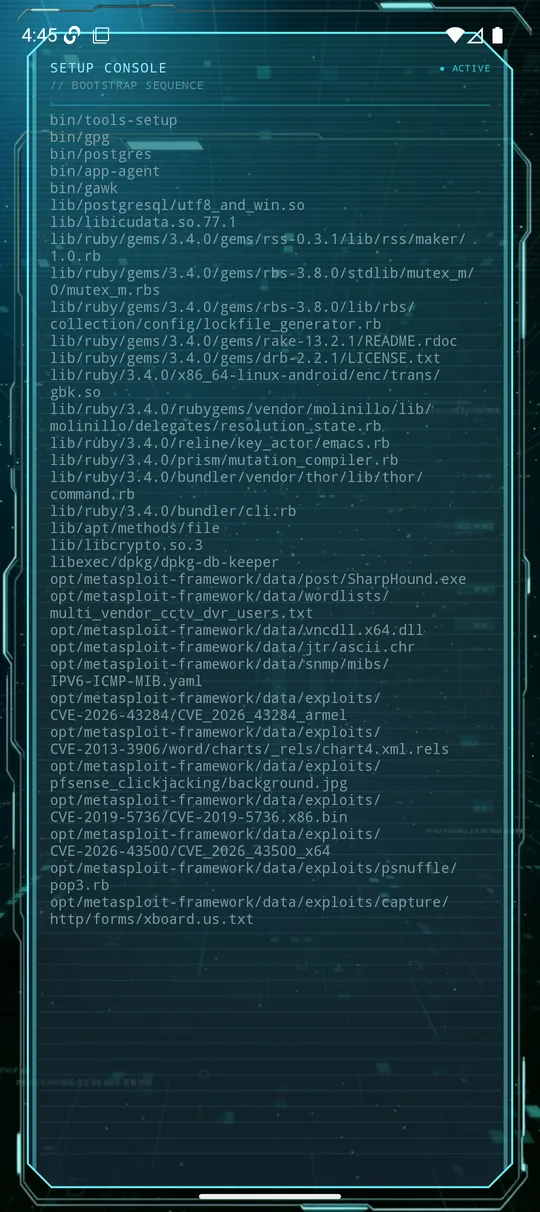
When setup finishes, the engine starts (PostgreSQL + the Metasploit RPC) and you land in the main workspace. Everything you scan and exploit runs from the phone itself.
Remote mode & the agent
Run the engine on a VPS, lab box or server you control and use the phone as the console over an encrypted gRPC link. Prerequisites, the services that must be running, enrolling a device, agent options and troubleshooting are on their own page.
Teams & shared engagements
Point several phones at one agent so the whole team shares hosts, services, credentials and loot. What is shared, buying seats, inviting people and removing them are on their own page.
The main menu
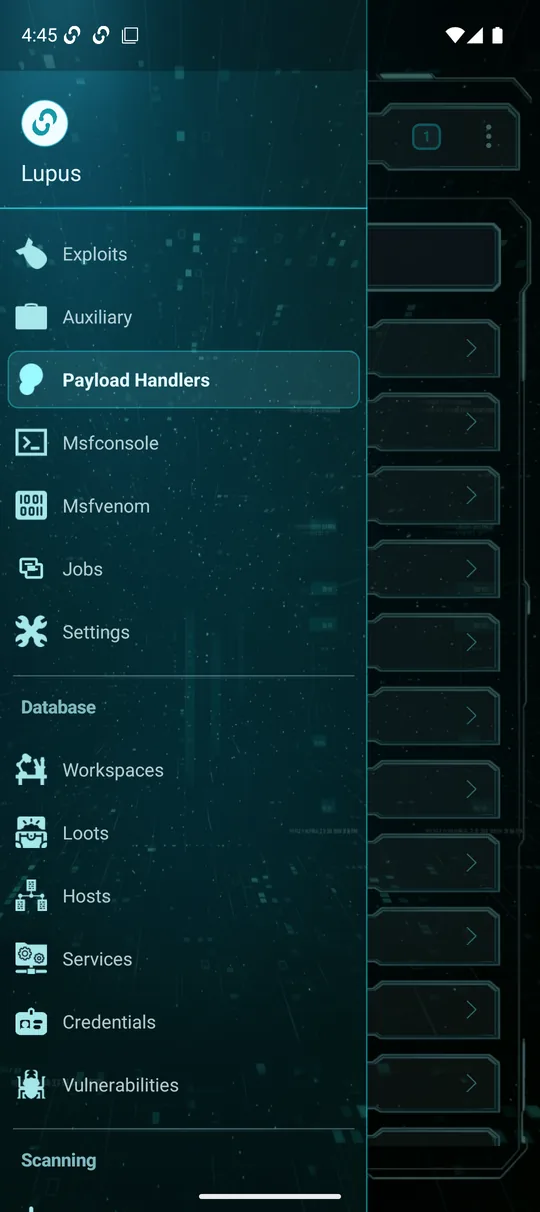
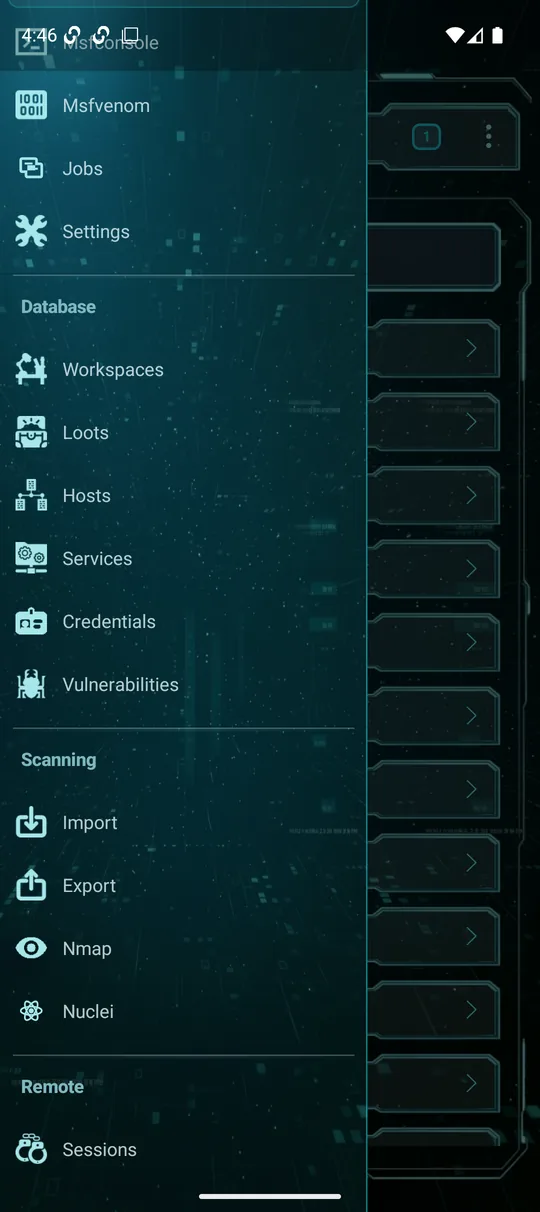
The hamburger (☰) at the top-left opens the navigation drawer — your index to every module, grouped into sections:
- Top: Exploits, Auxiliary, Payload Handlers, Msfconsole, Msfvenom, Jobs, Settings.
- Database: Workspaces, Loots, Hosts, Services, Credentials, Vulnerabilities.
- Scanning: Import, Export, Nmap, Nuclei.
- Remote: Sessions.
The badge at the top-right is the background tasks stack (covered below); the “⋮” menu holds per-screen actions.
Scanning — Nmap
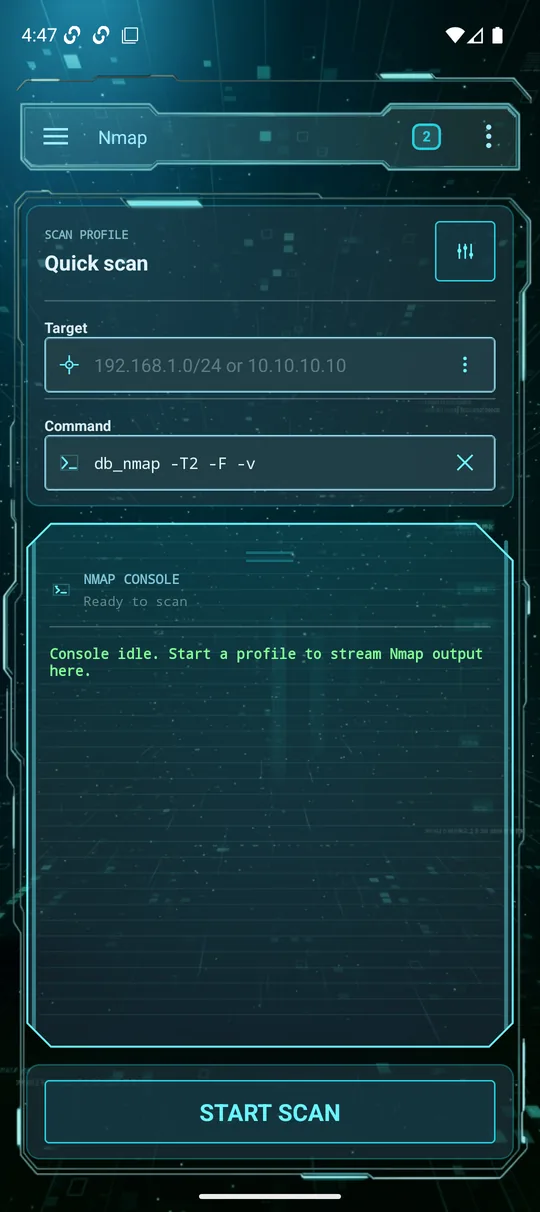
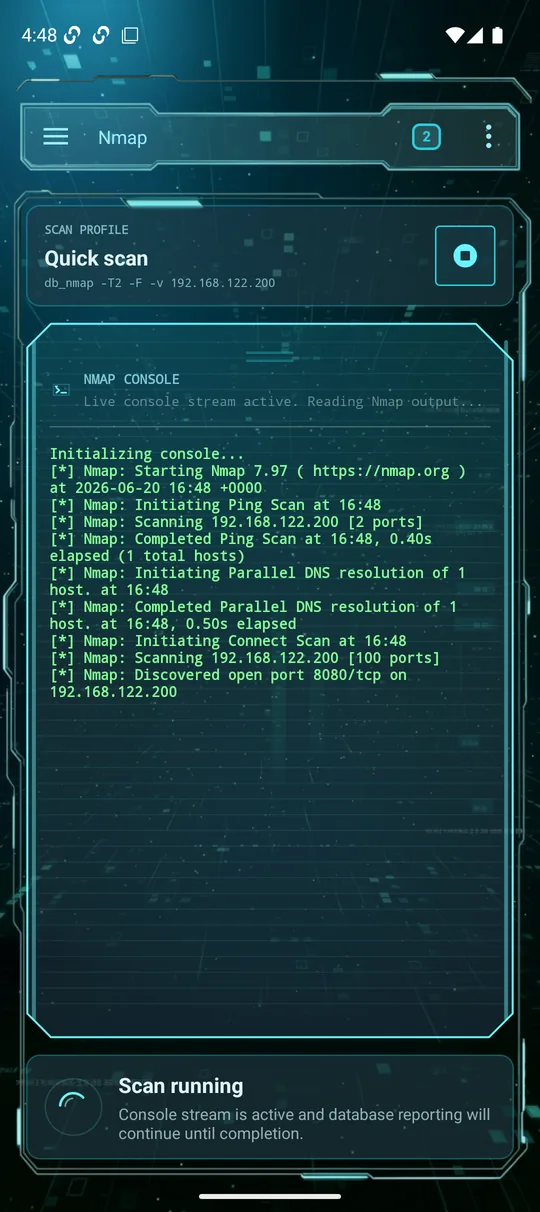
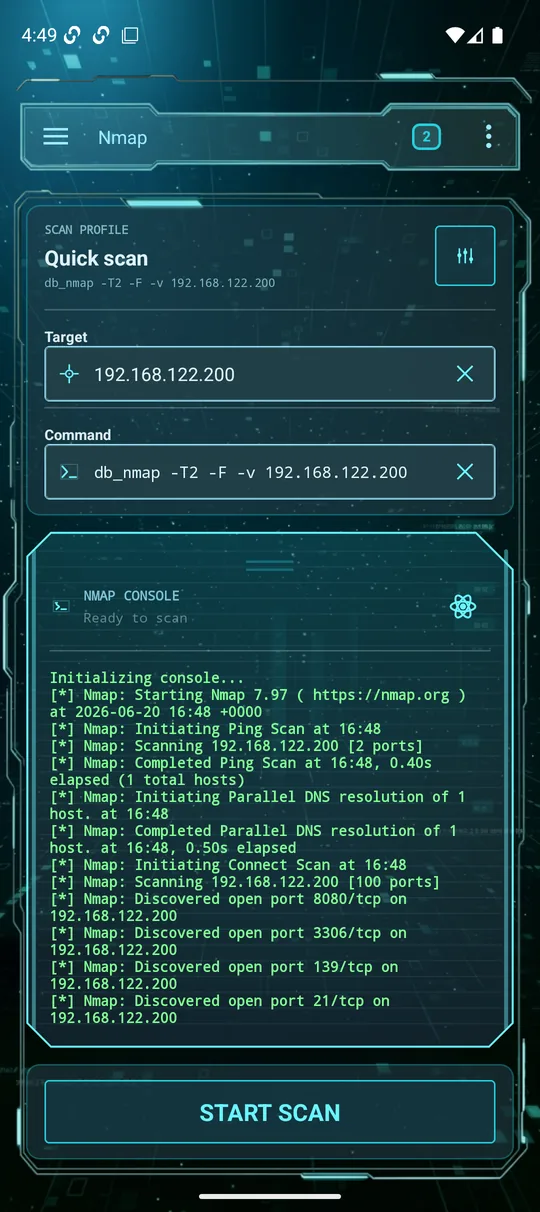
Nmap is usually your first step: discover a host and its open services, which then populate the workspace database. Open Nmap from the Scanning section.
Options, one by one
- Scan profile — a preset (e.g. Quick scan). The icon at the top-right switches profiles; each profile sets a different command.
- Target — a single host, a range or a CIDR (e.g.
192.168.122.200or192.168.1.0/24). What you type here is appended to the command. - Command — the actual
db_nmapline, fully editable if you want custom flags. Thedb_prefix means results are written straight into the workspace. - Nmap console — live output streams here while the scan runs.
- Start scan — runs it; the button becomes a stop control while active.
Scanning — Nuclei Pro
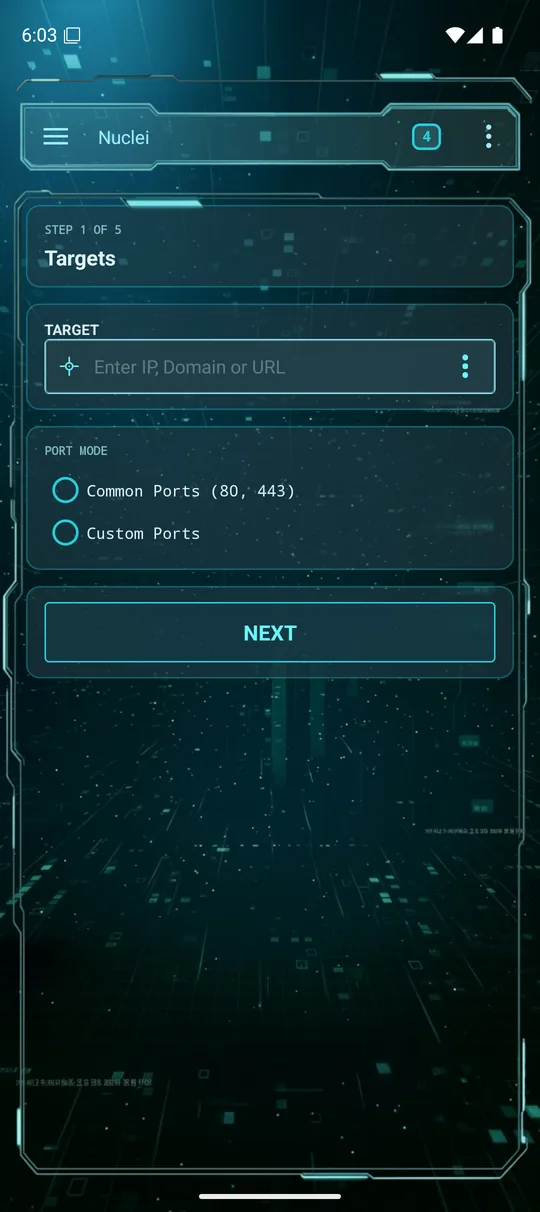
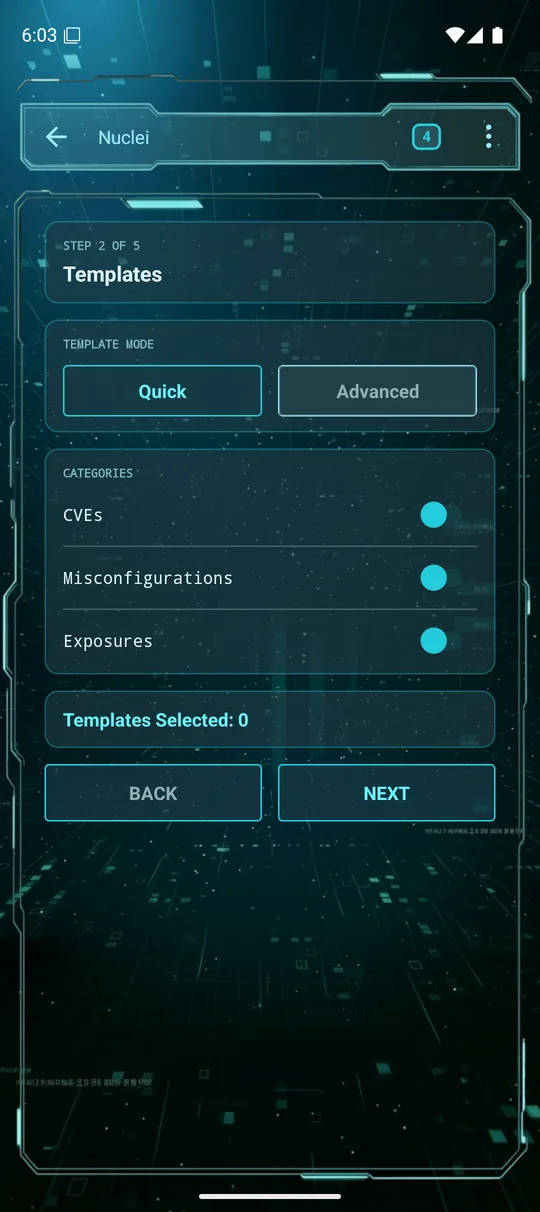
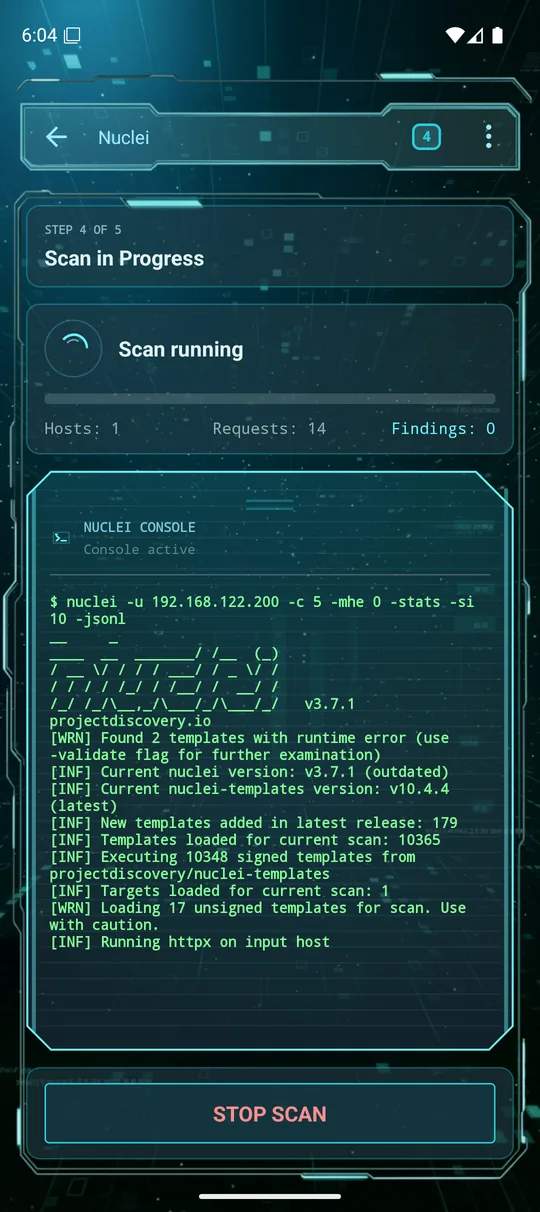
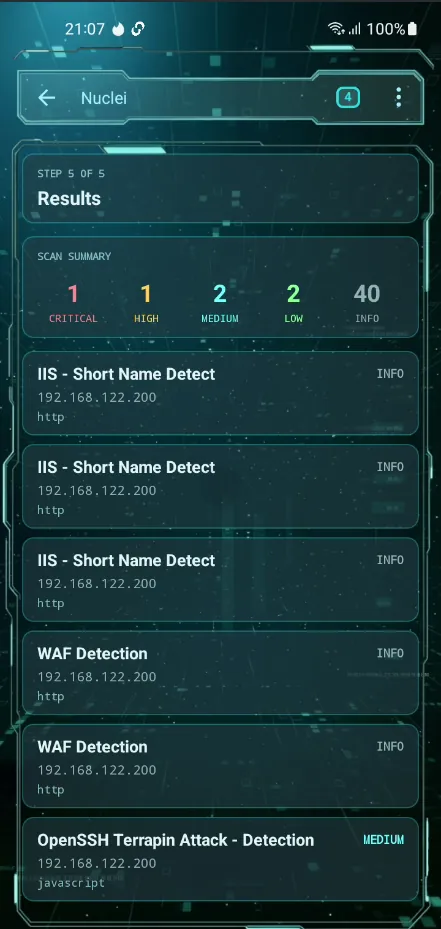
Nuclei runs thousands of community vulnerability templates against your targets and writes findings into the workspace as vulnerabilities. It's a short wizard:
- Target — enter an IP, domain or URL, and choose common ports (80, 443) or a custom set.
- Templates — pick Quick (CVEs, misconfigurations, exposures) or Advanced to choose specific template groups.
- Run — launch the scan; the console streams progress (templates loaded, requests, findings) and matches land in Vulnerabilities.
The workspace database
Everything you discover is stored in a Metasploit workspace. The Database section gives each record type its own searchable, filterable screen. Viewing is free; creating and editing records is Pro.
Workspaces
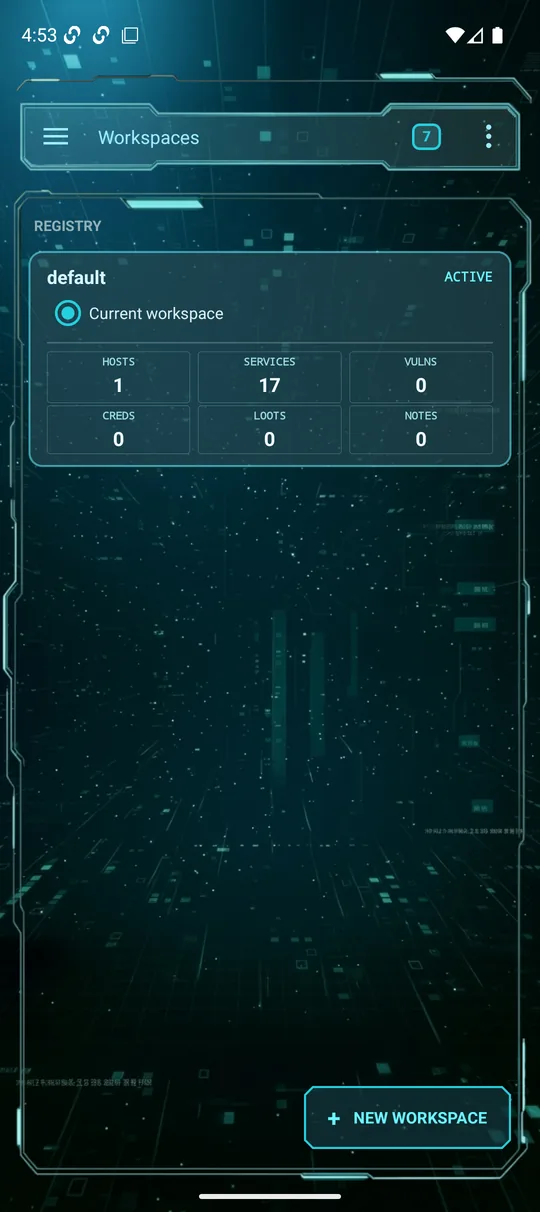
A workspace is an isolated project — keep each engagement separate. The registry shows the active workspace with a live count of hosts, services, vulns, creds, loots and notes. Use + New workspace to start a fresh one.
Hosts & Services
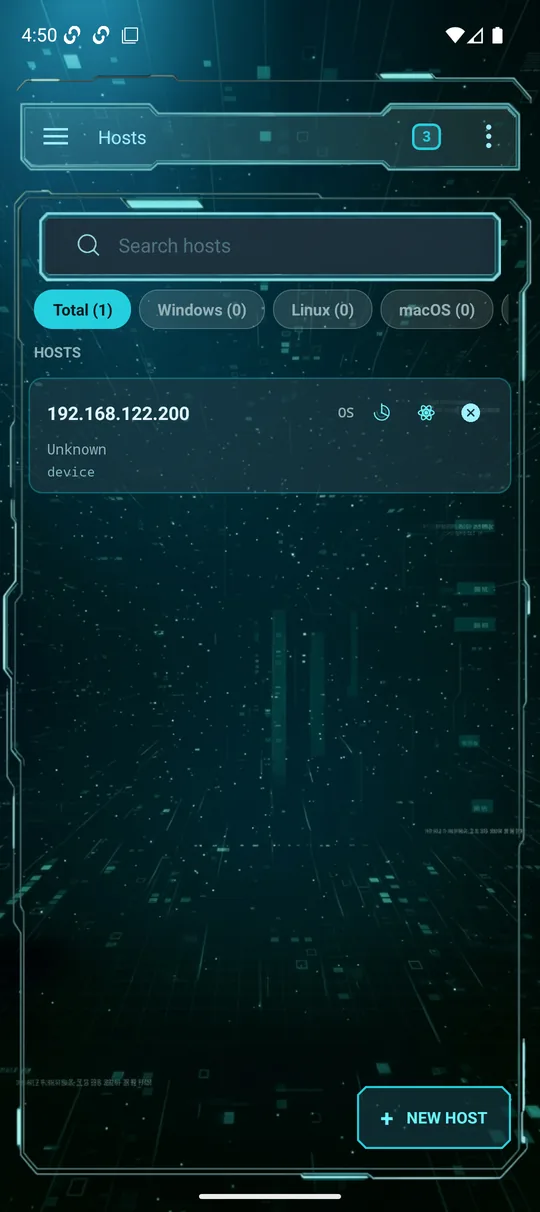
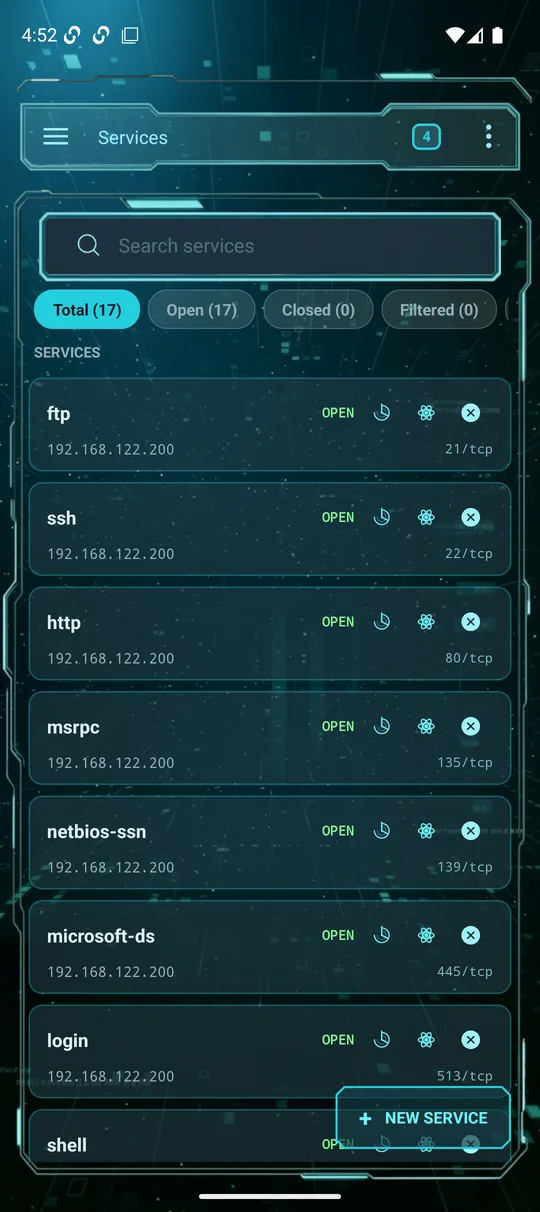
Hosts lists every discovered machine with OS-type filter chips (Windows / Linux / macOS) and a search box; each row has quick actions to re-scan it with Nmap or Nuclei. Services lists every open port/service across the workspace, filterable by state (Open / Closed / Filtered). Both feed directly off your scans.
Vulnerabilities, Credentials & Loots
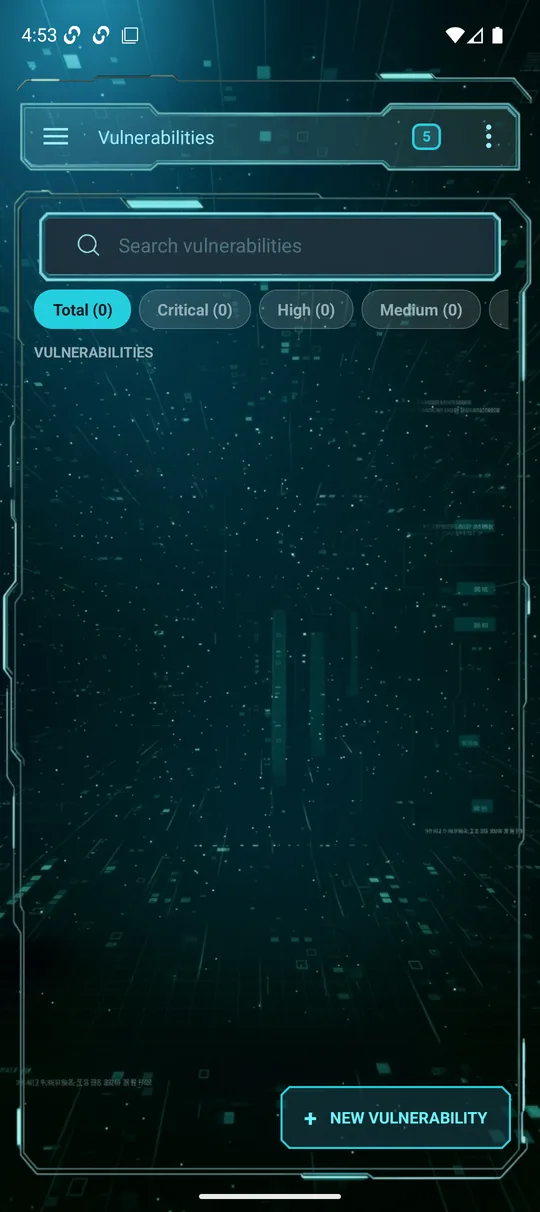
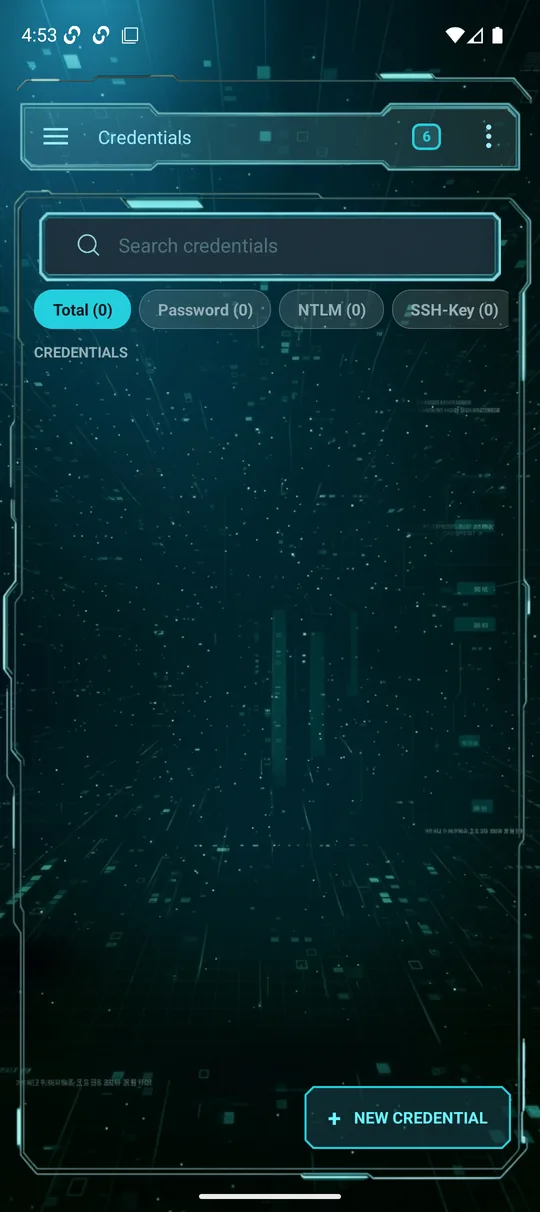
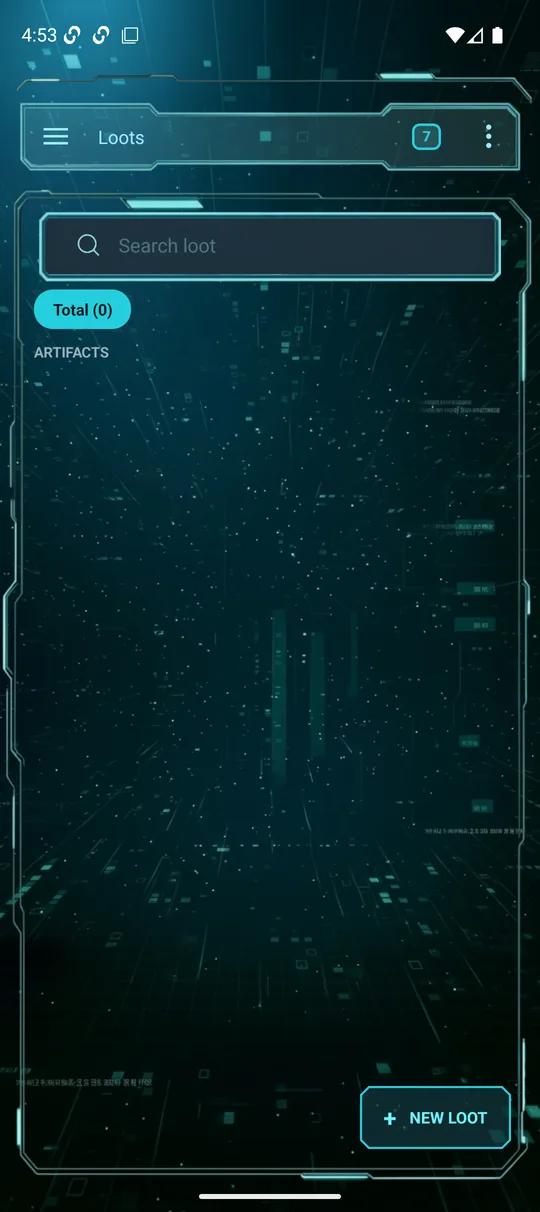
Vulnerabilities collects findings (from Nuclei or exploited modules), filterable by severity. Credentials stores captured logins (Password / NTLM / SSH-Key). Loots holds files and data pulled from targets. They fill up as you run vuln scans and land sessions.
Import & export Pro
Move workspace data in and out of Lupus — handy for continuing an engagement started elsewhere or archiving results.
Import and restore
Open the database transfer screen and select a supported scan export or a Lupus backup. Review the destination workspace before importing. A full Lupus backup also carries AI conversations; restore it through the app so the agent can rebuild the related records.
Export and backup
Export workspace data or create a full Lupus backup from the transfer screen, then save the file through Android's file picker. Check that the file was saved before deleting any source data. These are data exports and backups; a formatted PDF report is not included.
Exploits
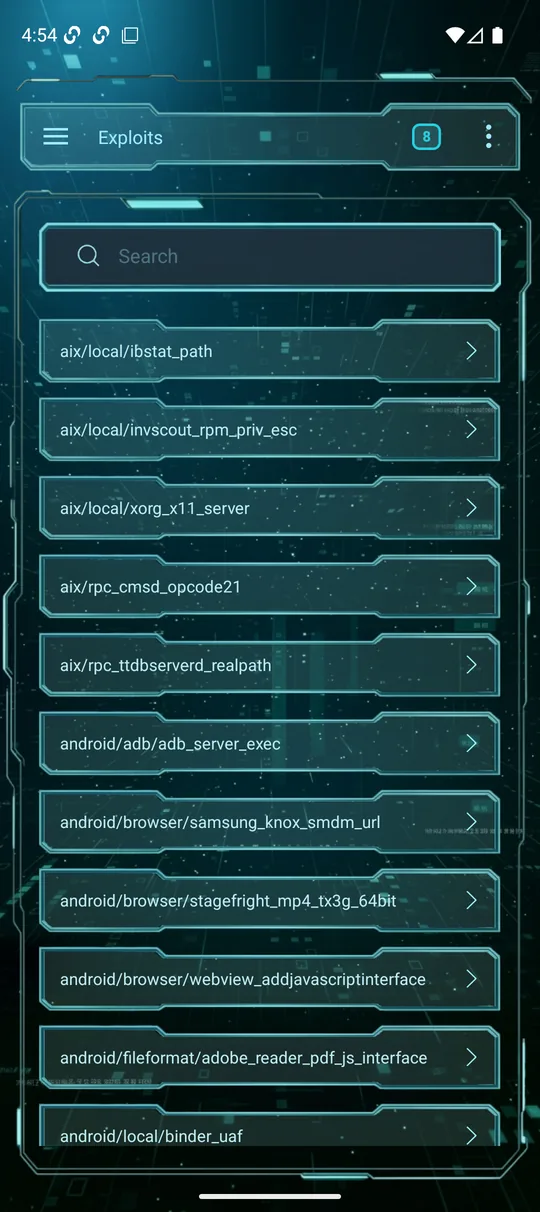
The Exploits module is the full Metasploit exploit catalog, searchable by name. Find a module, open it, configure it and run it.
Browse & open
Search (e.g. ms17_010_eternalblue) and tap a result to open its detail screen.
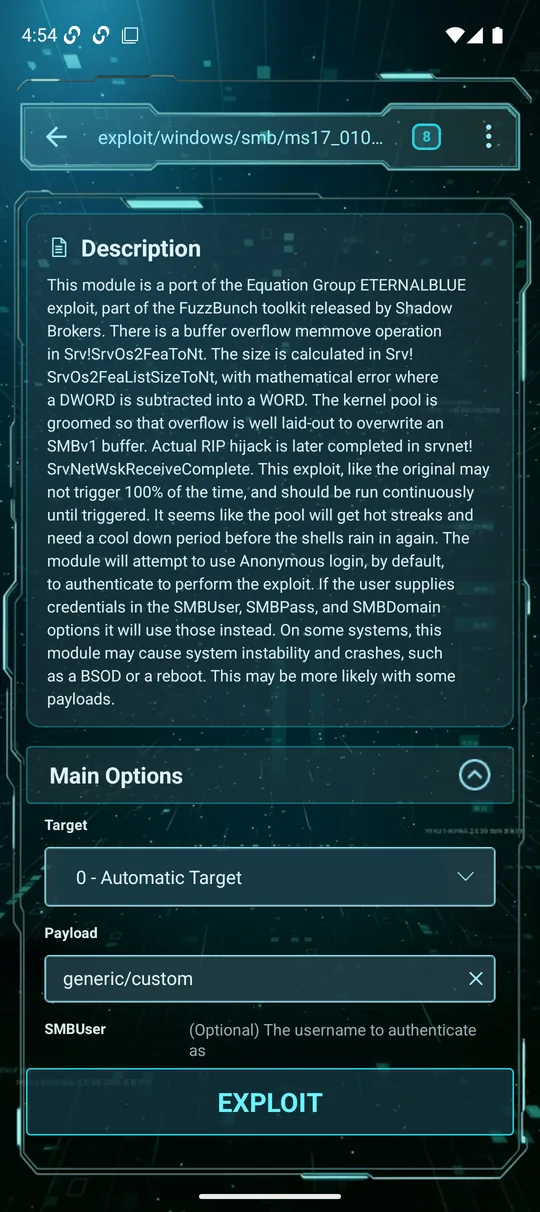
Configure the options (datastore)
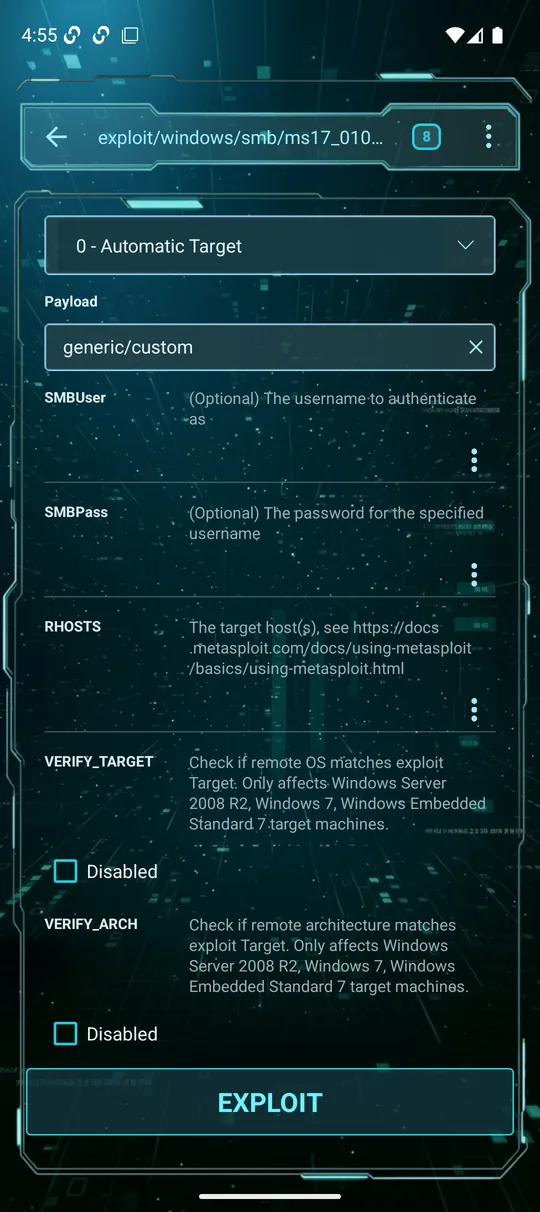
The detail screen exposes the module's datastore. Set the Target and Payload, fill required options — most importantly RHOSTS (the target host) — and toggle any flags (e.g. VERIFY_TARGET). Optional fields show their hint text. Then tap Exploit.
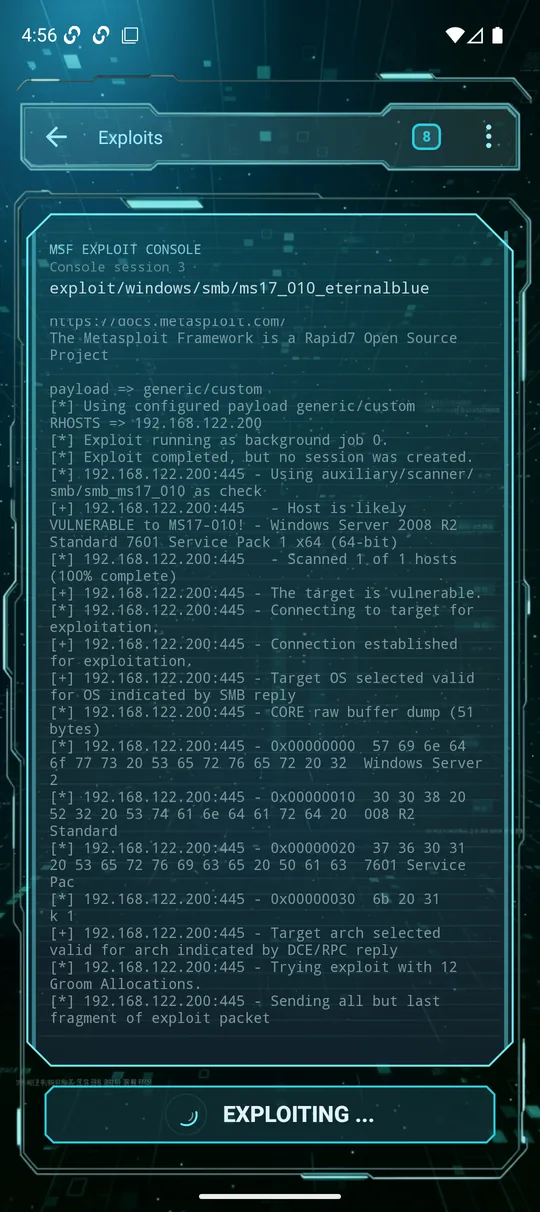
Run it
The console streams the attempt in real time — target validation, exploitation, and the result. If it succeeds you get a session (see Sessions); the run can also continue as a background job.
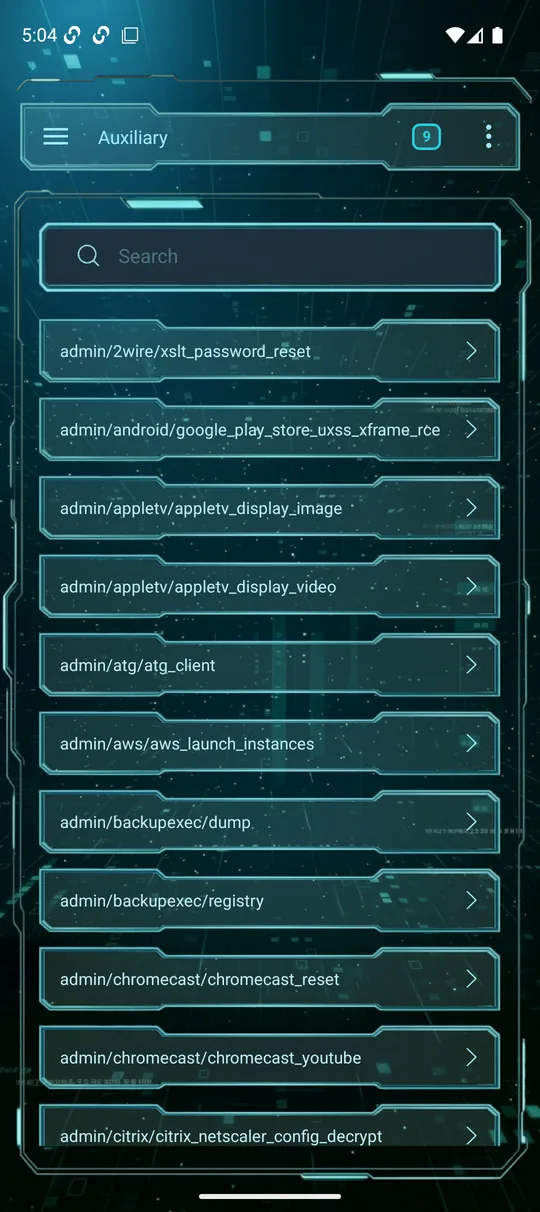
Auxiliary
Auxiliary modules are everything that isn't a direct exploit — scanners, fuzzers, brute-forcers, spoofers, gatherers and admin tools. The module works exactly like Exploits: search the catalog, open a module, set its options, and run it, with output streaming to the console and results landing in the database.
Payloads & handlers Pro
Msfvenom
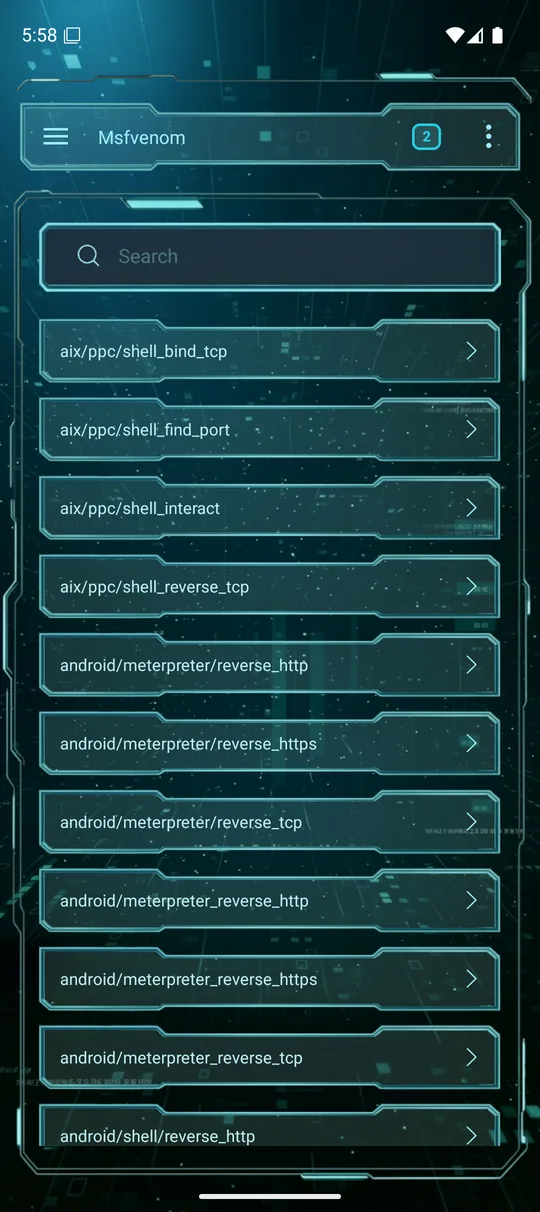
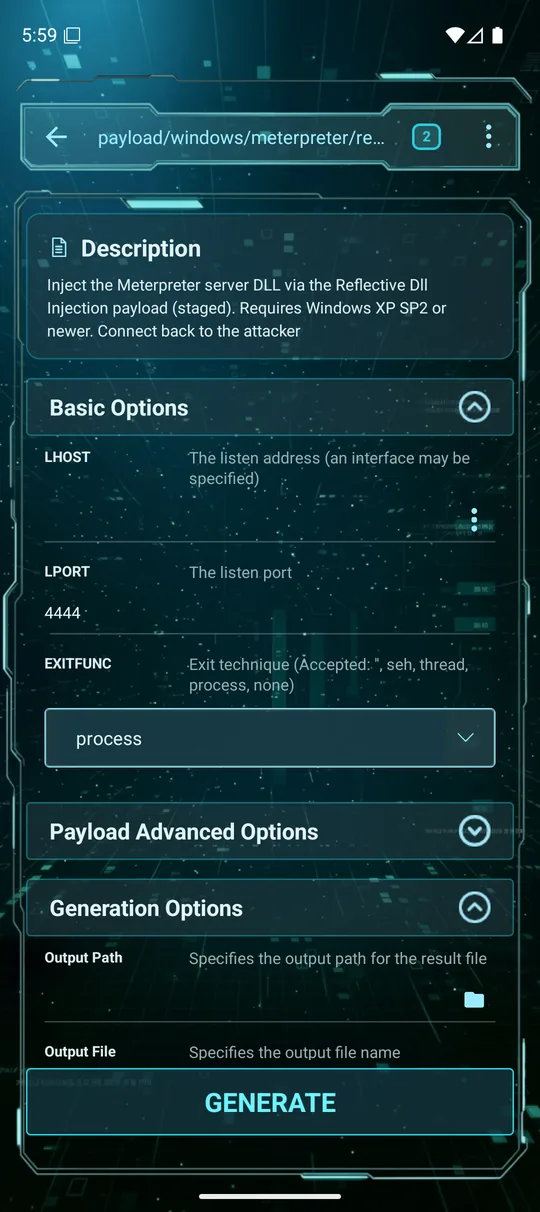
Generate standalone payloads (executables, scripts, shellcode) for delivery. Search the full payload list, pick one, then configure it: LHOST/LPORT, encoders and advanced options, plus the output path/file. Tap Generate to produce the artifact.
Payload Handlers
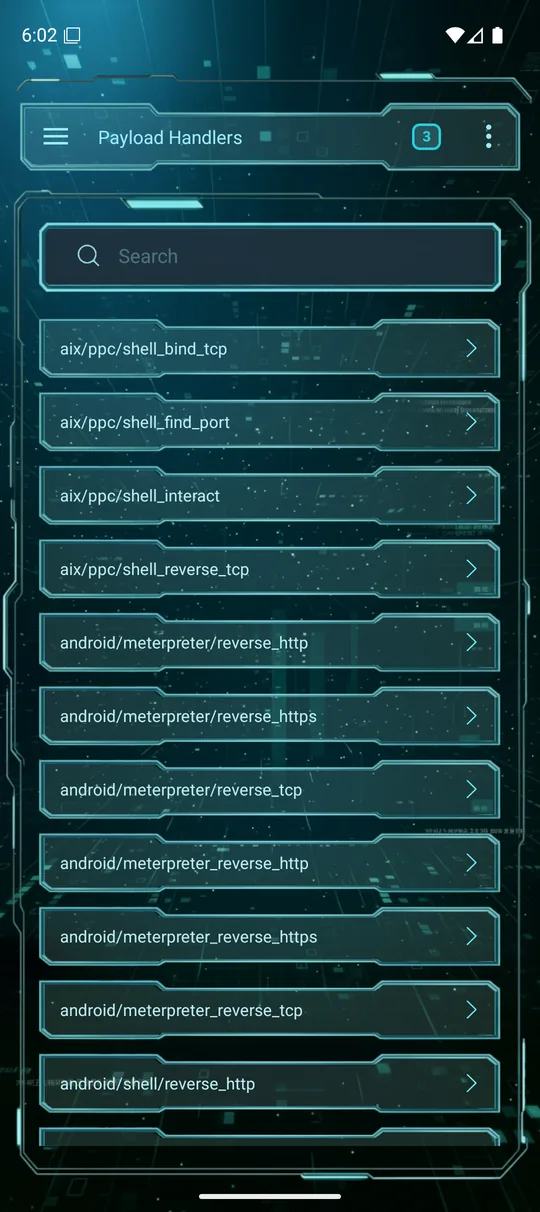
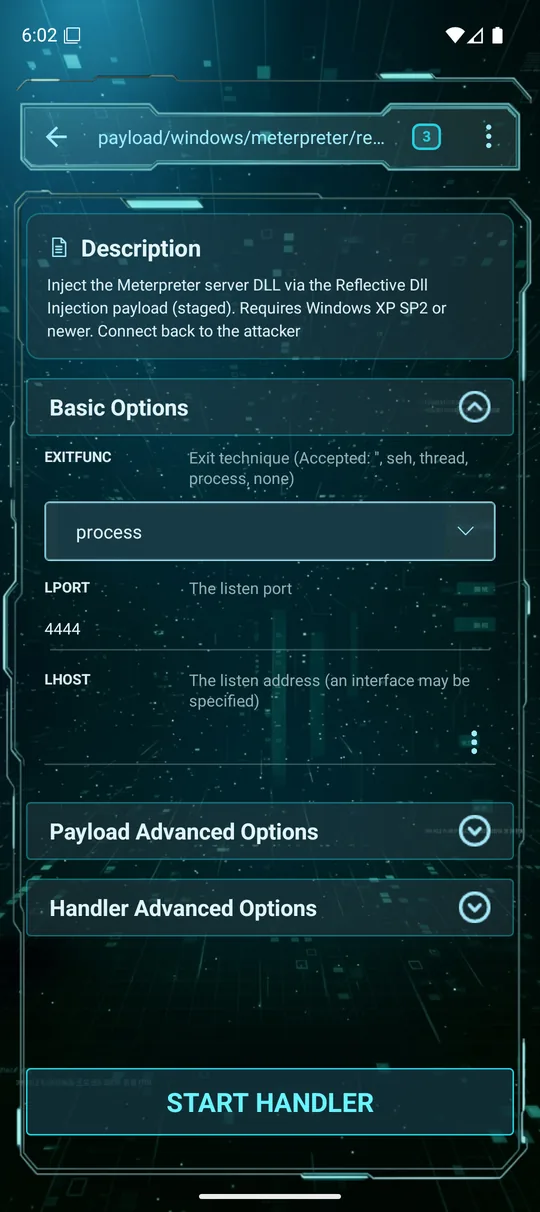
Start, stop and configure listeners (multi/handler) that catch connections from the payloads you deliver. Pick the matching payload, set LHOST/LPORT and tap Start handler; when a foothold connects it appears in Sessions.
Your own modules & payload files
Upload your own .rb or .py modules and msfvenom templates, let the phone sync them, and fix the case where an installed module does not appear in the browser.
msfconsole
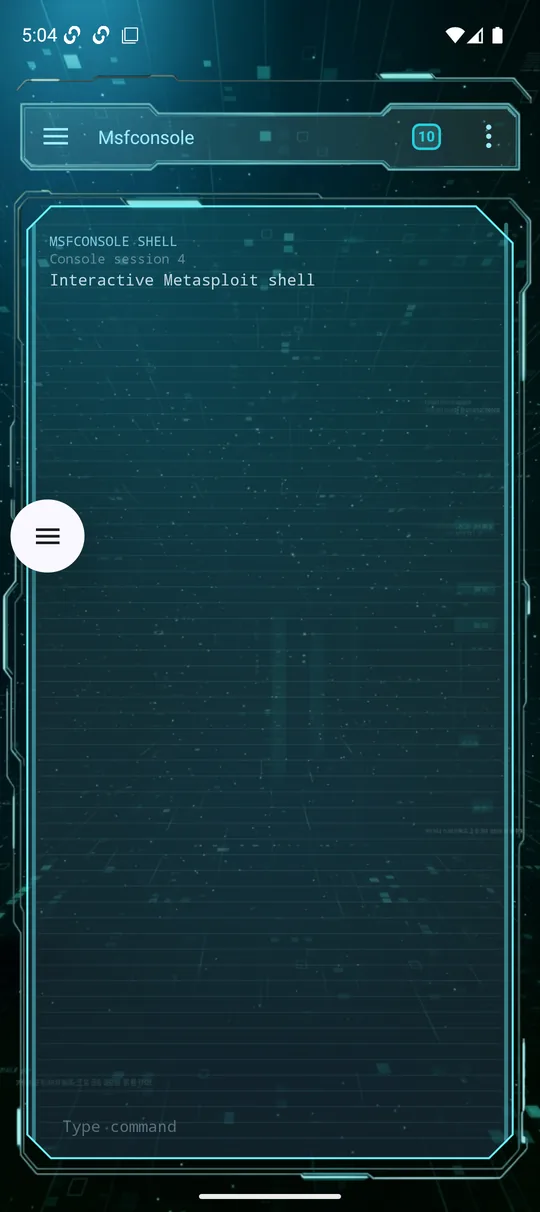
When you want the raw interface, Msfconsole gives you the interactive Metasploit shell. Type any msfconsole command at the prompt and the output streams back — the same engine that powers the touch modules, with nothing in the way. Great for one-off commands, search, db_ commands and anything not surfaced as a dedicated screen.
Sessions & post-exploitation
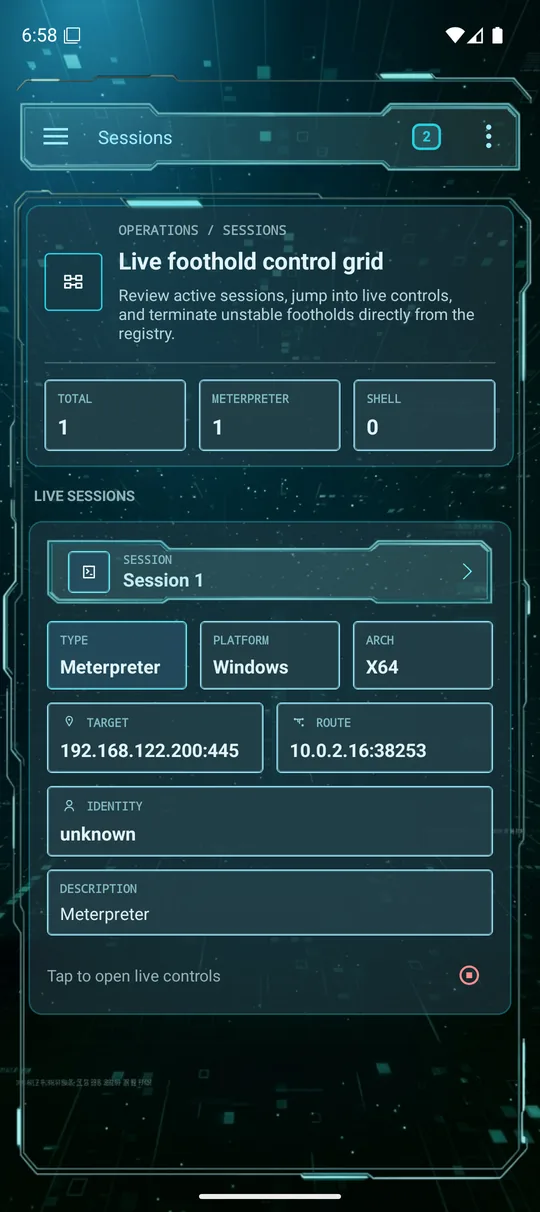
When an exploit or handler lands, the foothold appears in Sessions — the live control grid, with counts of total / Meterpreter / shell sessions. Each session shows its type, platform, architecture, target and route. Opening a session is free; the full post-exploitation toolkit is Pro.
Inside a session Pro
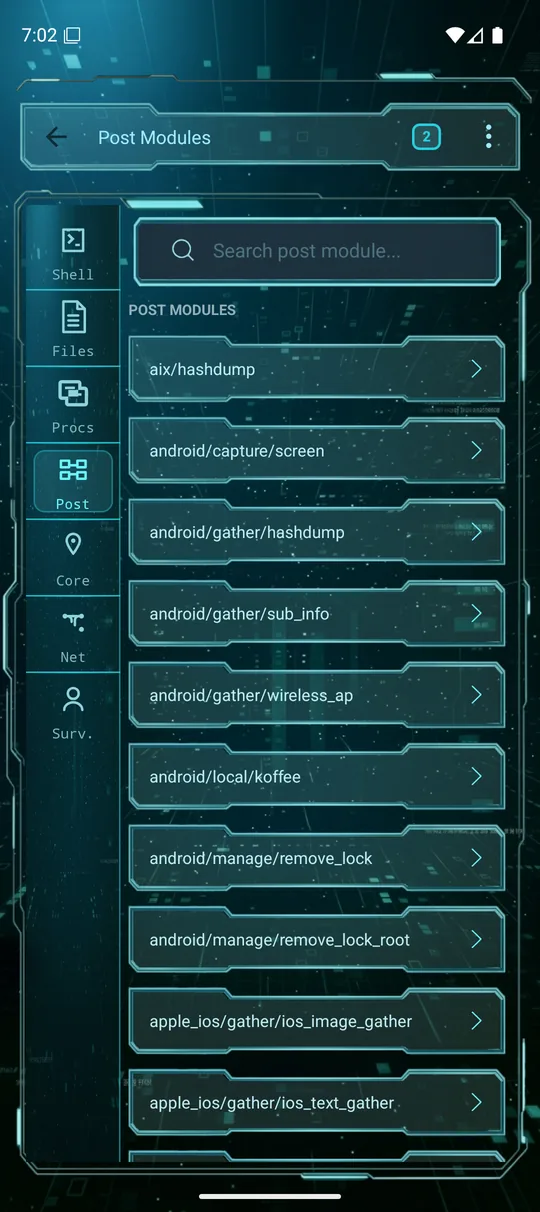
Tap a session to open its control surface. A left rail switches between tabs — Shell, Files, Procs, Post, Core, Net and Surv.:
- Shell — an interactive Meterpreter (or command) prompt; type any command and the output streams back.
- Files — browse the target's filesystem and download/upload files.
- Procs — list running processes, migrate into one, or kill it.
- Post — search and run Metasploit post-exploitation modules against the session.
- Core / Net / Surv. — session core commands, networking/pivoting, and surveillance helpers.
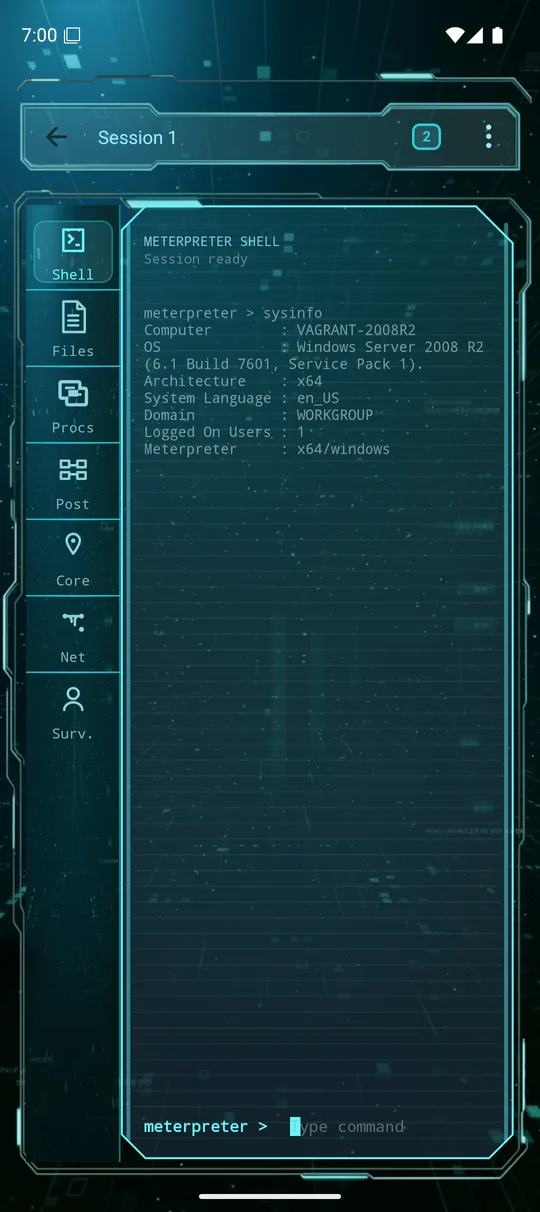
sysinfo on the target.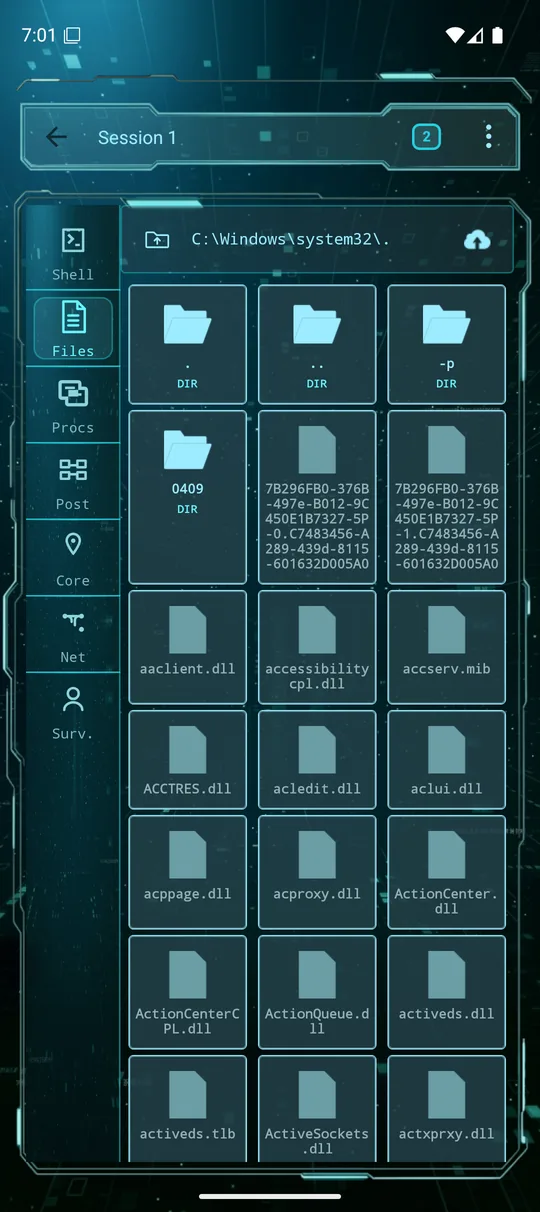
C:\Windows\system32, with download/upload.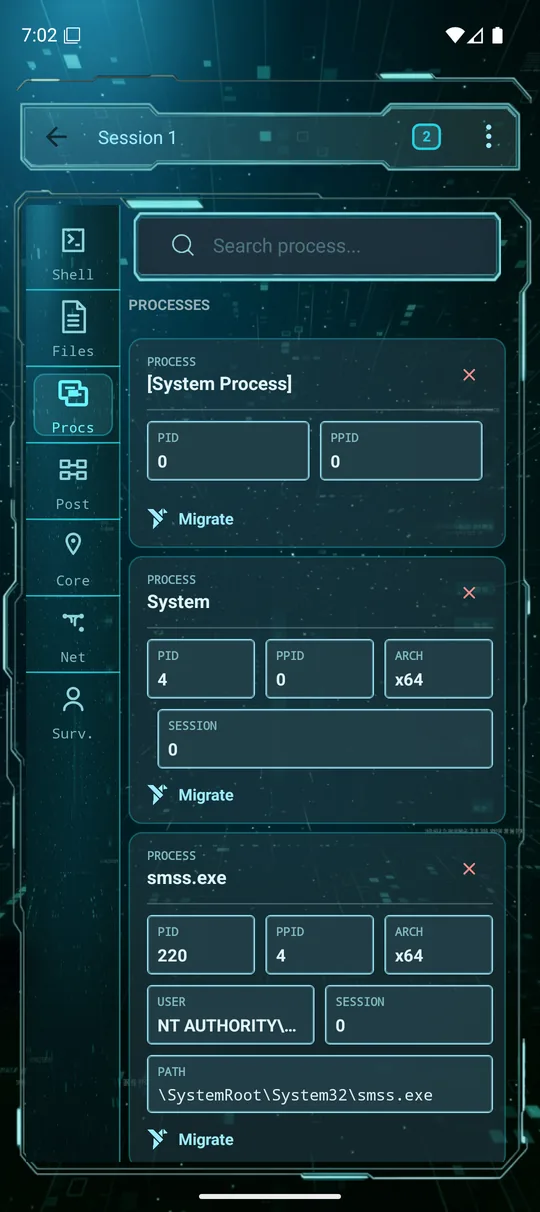
Jobs & background tasks
Jobs lists Metasploit background jobs — running handlers, scanners and exploits that continue after you leave their screen. Open it to see what's active and stop a job.
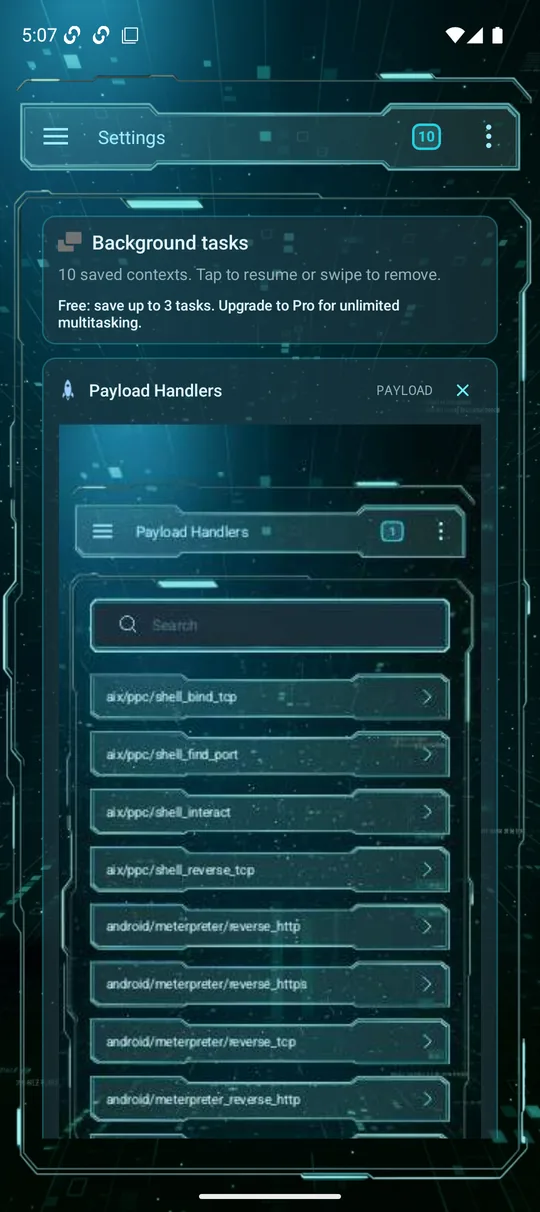
Background tasks (the badge at the top-right) is Lupus's own multitasking stack: it saves the context of screens you've opened so you can resume them instantly or swipe them away. The free tier keeps up to 3; Pro is unlimited.
Keeping Lupus off the network you're testing
Send Lupus' own traffic over mobile data while the phone stays on the audited Wi-Fi, so licence checks and AI calls never leave from the client's network.
Settings
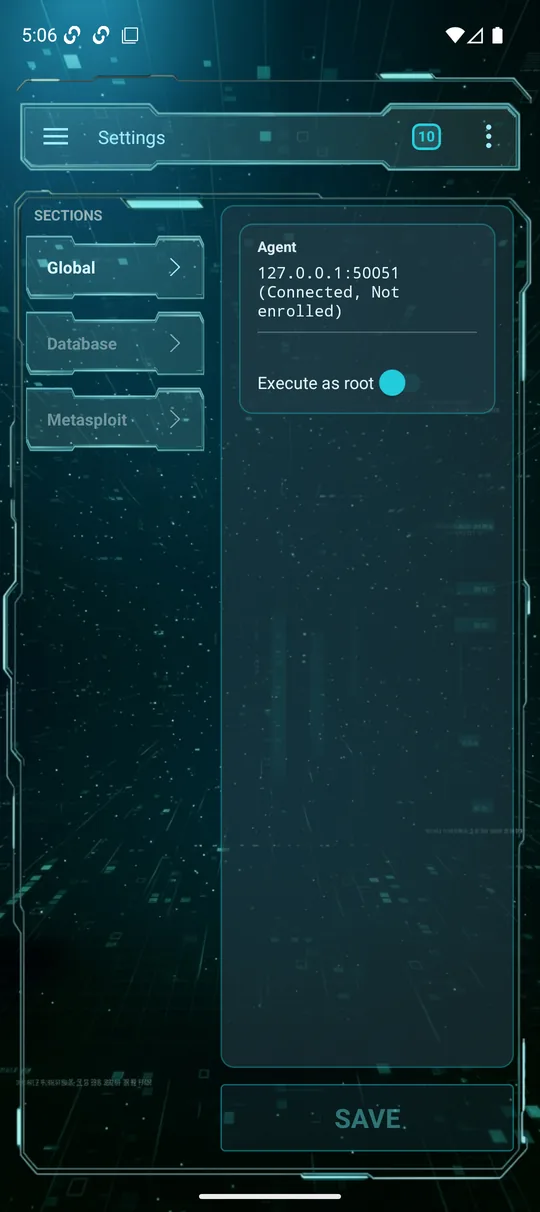
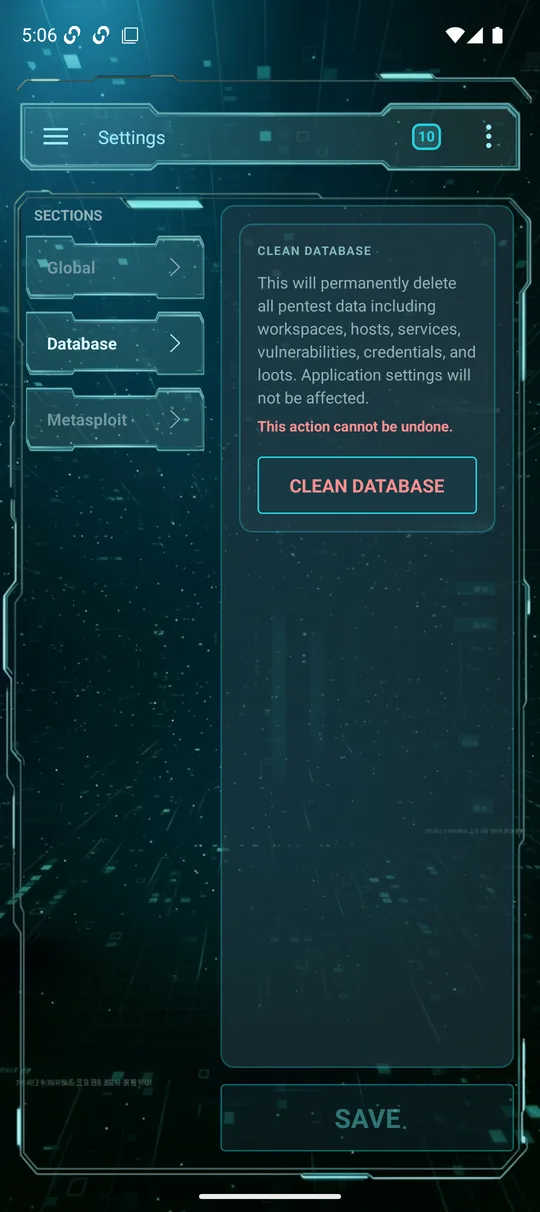
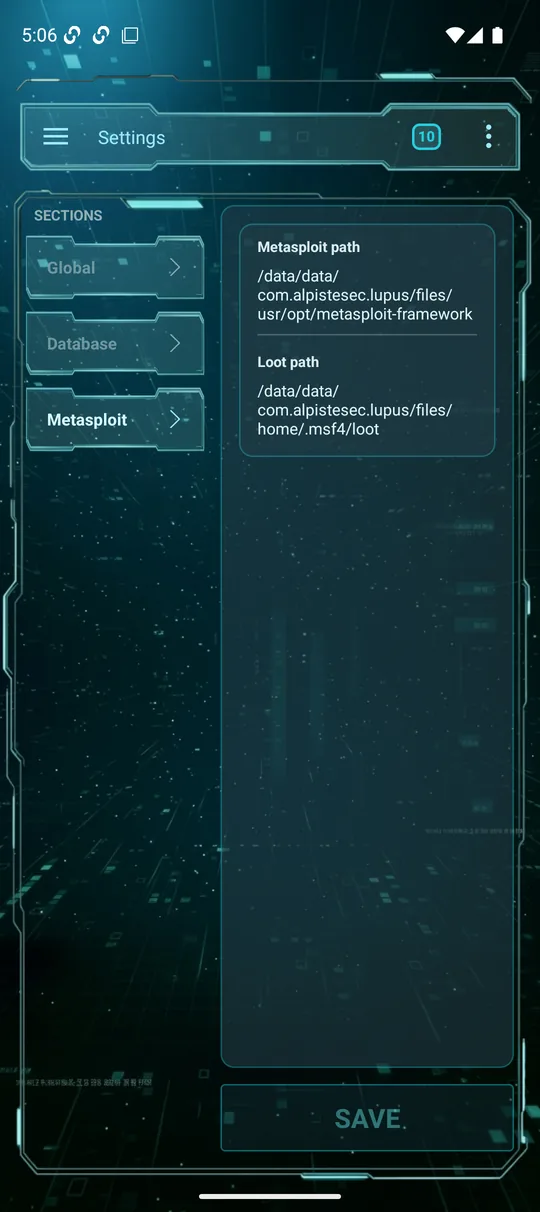
Settings has three sections down the left side:
- Global — the agent connection status, an Execute as root toggle, the Network block that decides whether Lupus' own traffic leaves over mobile data, on-device tool updates and your account.
- Database — Clean database permanently wipes all pentest data (workspaces, hosts, services, vulns, credentials, loots). App settings are kept. This can't be undone.
- Metasploit — the framework and loot paths in use by the engine.
Troubleshooting
The confirmation code never arrives
Check your spam/promotions folder and search for no-reply@alpistesec.com. Use Resend code — the code expires after 15 minutes, so always use the newest one. Mark the message as “not spam” so future emails land in your inbox.
The agent won't connect
Make sure the agent is running in enrollment mode, the host/port are reachable from the phone, and you're using a fresh enrollment code. After the first successful enrollment, keep the saved connection instead of enrolling again.
I uploaded a module and it does not show up
Open My arsenal and look at the file's status. The sync only runs while the app is open, online and connected to an agent, so it may simply not have run yet. If it says failed, the Ruby error from Metasploit is shown underneath — fix the file and upload it again.
My arsenal says the quota is full
An account holds 50 MB, with a 20 MB ceiling per file. Delete something you are not using; the next sync removes it from your device too.
The AI stopped working after I set Network to Always
Always refuses to use the Wi-Fi, so if there is no mobile data connection nothing gets through — that is deliberate, not a bug. The status line under Settings → Global → Network says which it is: check that mobile data is switched on and a SIM is present, or move to Auto, which only uses mobile data when the Wi-Fi has no internet.
My scans broke while Lupus was on mobile data
They shouldn't — scans, Metasploit and anything aimed at a private address deliberately stay on the Wi-Fi. What does break them is Android deciding the Wi-Fi has no internet and routing around it entirely; the Network block warns you when that happens. Reconnect to the Wi-Fi, or accept its “stay connected” prompt, and the local network comes back.
I want to start over
Use Settings → Database → Clean database to wipe pentest data while keeping the app configured, or create a new Workspace to keep a clean slate per engagement.
Still stuck? Contact support — or see all features and pricing.